In order to imagine a spinal disc, think about a jelly donut. The donut has a tougher outer layer and a soft center inside. When a person has a herniated disc, the soft center in that donut bursts through. The result varies from person to person, but usually includes irritation of the nearby nerves, numbness or weakness in an arm or leg, and searing back pain. However, some lucky people might have a herniated disc and never know it, because they have no symptoms at all. There are many ways that help ease the pain of a herniated disc. Yoga for the herniated disc problems is one of the things you can do at home, which can help assist in your recovery and ease the pain.
Guidelines of Doing Yoga for Herniated Disc Recovery
Though yoga can be a great thing for recovery, there are some points to remember before you start. First, your doctor must be okay with the use of yoga – some damage to the spinal discs might be too severe to handle the rigors of yoga. Secondly, you will need an experienced yoga teacher to ensure you are doing the moves correctly, as incorrect postures can lead to further damage. There are also some precautions you will keep in mind at all times:
- No bending past a 90 degree angle at the hips
- No forward folding with locked knees
- No seated forward folds
- No rounding of the spine
- No deep twists
If you feel any numbness, tingling or pain when performing yoga, stop immediately!
Yoga Exercises for Herniated Disc
When using yoga for herniated disc recovery, here are some great exercises to help:
1. 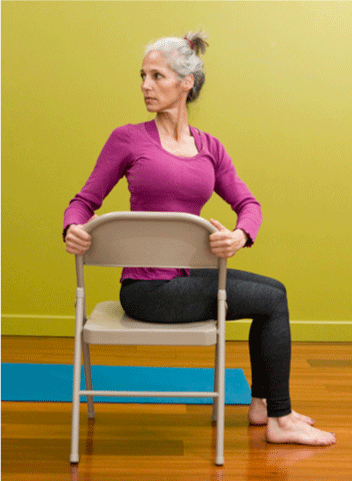 Bharadvajasa
- Using a chair for support, sit sideways with your right hip against the back.
- Stretch your trunk and keep your shoulders back.
- Exhale and turn toward the back of the chair, synchronizing your right and left sides.
- Place your hands on the back of the chair, and pull with the left while you push with your right to help turn your back. Your truck will roughly become parallel with the chair back.
- Turn to the maximum and breathe there for 30 seconds. Repeat this with the other side of your body.
2. 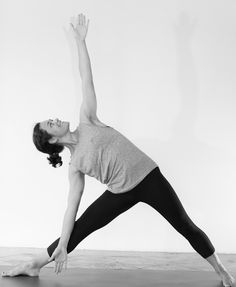 Trikonasana on the Wall
- Using the wall for support, spread your feet wider than your shoulders.
- Your arms should be stretched out; parallel with the floor.
- Exhale and bend to the right, bringing your right hand to the floor. Inhale, return to your starting position, and repeat on the other side.
3. Vibbrasana
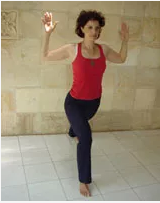 This is one of the great exercises when using yoga for herniated disc.
- With your feet hip-distance apart and arms parallel to your body, step forward with your left foot.
- Inhale as you bend your left knee, draw your shoulders back, open your chest, and lift your arms as if you were holding something wide and heavy.
- Keep your head forward. You will keep your balance by staying firm on your heel. Do not move your lower back while doing this exercise.
- Exhale and come back to center. Repeat on the other side.
4. Balasana on Bolster
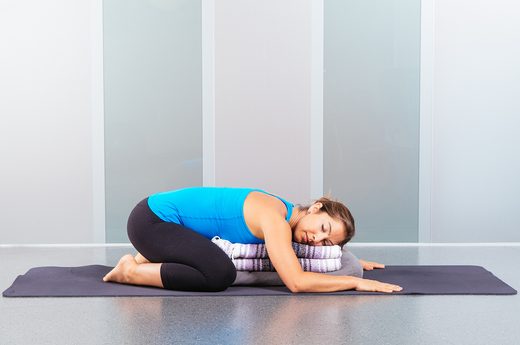 With your hands and knees on the floor, place your chest and belly on a bolster.
- Turn your head to the side.
- Have your arms stretch forward.
5. Locust Pose
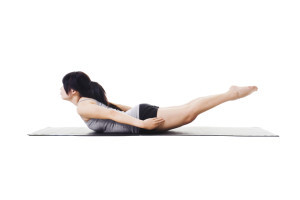 Lie on the floor on your belly.
- Your arms will be stretched parallel to the body and your forehead will press on the floor.
- Inhale and lift your chest, head, legs and arms from the floor.
- Keep legs and arms straight. Spread your toes and fingers. Focus on your breathing.
- Return to center after a few seconds.
6. Warrior II Pose
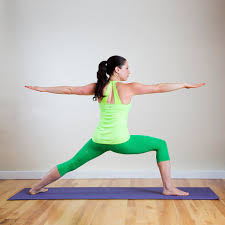 Use a wall for support if needed.
- Stand straight with your palms on your sides. Inhale.
- Upon exhaling, move your right foot forward, raise your right arm so it is parallel with your right thigh, and stretch the left arm behind you.
- Turn the left foot at a 90 degree angle. Stretch your legs as much as you can.
- Stay in position for 30 seconds and exhale as you return to the starting position. Repeat the exercise with the opposite leg.
Remember, before you try any yoga for herniated disc, make sure your physician approves of your exercises. If any discomfort or pain occurs, go to see your doctor.